6 Steps to Clean Windows for a Streak-Free Finish
Learn how to make a DIY window cleaning solution and follow our step-by-step guide for a streak-free finish.

KEY TAKEAWAYS
- Learn how to make a DIY window cleaning solution for a streak-free finish.
- Follow a step-by-step guide to clean all parts of your windows, including frames, glass, screens, blinds, and shades.
- Regularly cleaning your windows helps maintain their quality and ensures a clear view of your surroundings.
While it’s not a glamorous job, window cleaning offers many benefits and is an important part of home maintenance. Get your windows looking spick and span as you follow this step-by-step window cleaning guide. We’ll teach you how to clean all parts of your windows, from the frames and glass to the screens, blinds and shades.
Step 1: Mix a DIY Window Cleaning Solution
While you can buy standard window cleaners at many stores, we recommend mixing a homemade solution. An ammonia-free solution is the best way to ensure a clean finish without streaks. Plus, making it yourself with supplies you probably already have at home can help save you some money. As window experts, these are the ingredients we have found to be most effective:
- Distilled white vinegar and water: Cleaning windows with vinegar has been a tried-and-true trick for ages, and with good reason. The acidic composition of white vinegar works efficiently to break down the film that can accumulate on your windows. For a basic vinegar cleaning solution, we recommend mixing one part distilled vinegar to 10 parts warm water in a spray bottle. Label the container and save leftovers for future use.
- Rubbing alcohol: If you have an especially stubborn area on your window, you can start your cleaning process by applying a solvent like rubbing alcohol to a clean cloth and rubbing it directly on the spot. You can also add rubbing alcohol to the vinegar and water for a slightly more powerful cleaning solution.
- Dish soap: Using a few drops of Dawn dish soap in your homemade window cleaner can help remove tough grime, which may be especially helpful when washing the exterior of your windows.
- Essential oils: While the scent of distilled vinegar or rubbing alcohol typically fades within moments of use, you may want to add a drop or two of your favorite essential oil to your homemade window cleaning solution. Adding lemon essential oil is a popular choice for creating a crisp and clean aroma.
lightbulb Pro Tip: If you decide to purchase a standard window cleaner instead of making your own vinegar window cleaner, avoid using those that are heavily based in ammonia or alcohol. It may seem like they’d produce a more intense clean, but they can leave window streaks and even a thin film that attracts dust and moisture.

Step 2: Prep Your Windows
Now that you’ve prepared the window solution, you can start prepping your windows. To avoid spreading dust and dirt around after you polish your windows, first clean out your window tracks, dust your frames and wipe down the ledges. You can use a soft brush or vacuum to do so. Next, use a clean, dry microfiber cloth to wipe the dust from the glass panes. Remove any obvious marks or smudges by applying a small amount of nonabrasive cleaner with a microfiber cloth. For stubborn stains, you can also try a solvent like acetone or mineral spirits. Just rub the cloth on the areas of glass that need spot-cleaning. Be careful to avoid getting cleansers or solvents on the frames, as it may discolor the finish.
lightbulb Pro Tip: No matter how stubborn certain stuck-on marks may be, never use a razor blade to scrape them off. This can cause permanent scratches to the glass.
Step 3: Wash Window Frames
When it comes to cleaning frames, avoid power washing. Use warm, soapy water on a rag and avoid abrasive chemicals that may discolor the finish. Stubborn stains and deposits may be removed with mineral spirits or a cleaning solution like Pine-Sol® applied with a clean, dry cloth.
The Best Way to Clean Your Windows
01:45
Step 4: Clean Glass from Top to Bottom
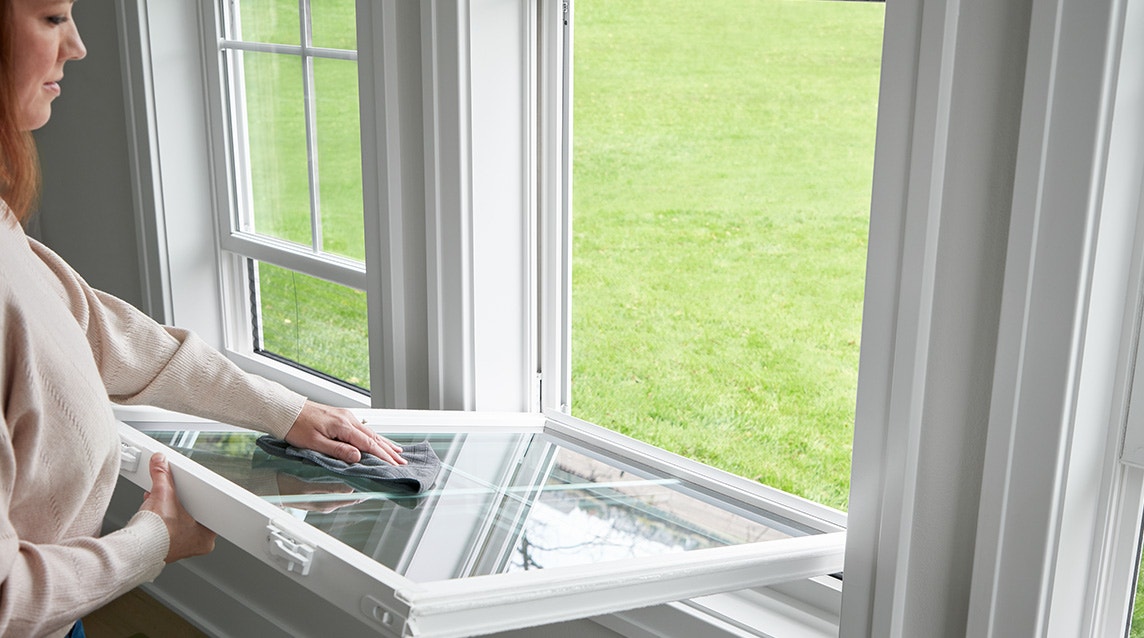
We recommend using a lint-free microfiber cloth to clean your windows, as paper towels are likely to leave behind lint and fibers that can make your clean windows appear dirty. Spray your glass cleaner directly to the microfiber cloth, instead of spritzing the window itself. This can help prevent the cleaning solution from getting on your window frames. Work your microfiber cloth in a zig-zag motion down the window, starting at the top. Once you’ve completed the entire pane, grab a dry microfiber cloth to buff out any remaining solution residue. You’ll want to do this quickly after cleaning to prevent streaks.
Cleaning Double-Hung Windows
If you have double-hung windows, tilting the sashes in makes it easy to clean exterior surfaces from the interior of your home. We recommend cleaning the top sash first, starting with the exterior and followed by the interior, and then repeating the same process on the lower sash. Watch our step-by-step video to learn more about window washing for easy-clean double-hung windows.
00:30
If you’re washing larger, hard-to-reach outdoor windows, a squeegee may help expedite the cleaning process. Mix a slightly more diluted solution in a bucket, wash the windows with a sponge and use the squeegee to wipe the solution off from the top down. Wipe the edge of the squeegee clean after each swipe to help avoid dripping.
lightbulb Pro Tip: If you find that you still have window streaks, rinse your window with water and dry it a second time.
Step 5: Vacuum Window Screens
The best way to clean window screens is to vacuum off dust and dirt with an upholstery brush attachment. For grease spots, typically found on kitchen window screens, use a sponge, hot water and a mild detergent. Remember to be gentle as screens can bend easily.
If you have a Rolscreen® retractable screen or Hidden Screen, follow the same cleaning instructions as above, but be sure your screen is completely dry before putting it back in the stored position.
Step 6: Dust Blinds and Shades
If your windows have Pella’s between-the-glass window treatments, you do not need to dust your blinds or shades. These low-maintenance treatments are tucked between the panes of glass and protected from dirt and damage. However, for standard blinds or shades that are fashioned over the glass, regular dusting will help them maintain a like-new appearance. For wood blinds, dust with a dry cloth or vacuum gently with a soft brush attachment. If you have plastic or metal blinds, you can immerse them in a tub of lukewarm water and mild detergent. Then, rinse with clear water and let air dry before reinstalling. For fabric blinds or shades, use a vacuum cleaner with a drapery brush attachment to remove dust and a damp cloth to remove any smudges or fingerprints.
We recommend cleaning all parts of your windows at least twice a year for optimal quality, but you can clean them as often as once a month if you like. Remember to take your time, pay attention to detail and enjoy the satisfaction of seeing your surroundings through streak-free glass.


